.

Friday, November 30, 2007

Nativity and 'Politically Correct' Cards


I really love my new Nativity stamp set from Stampin up. I have made a number of different cards with it already this year and have loved everyone of them. Now that I have my Nestabilities (as well as understand the 'concept' of Nesting - duh!) I am using them with all sorts of colors and layers. I have found that they add so much depth to an otherwise plain card. I am still making my way through some of my Christmas scrap paper that I purchased this year, so I have had a lot of fun piecing different schemes together.

Ah... I love the Christmas tree on this next card. I borrowed it while playing at my girlfriend Nancy's house one day and I still have yet to use all the images I stamped with it. It reminds me of a 'fuller' version of a Charlie Brown Christmas tree. While she and I went shopping that day we ran into this series of stamps at Paper Pastimes - apparently the company that made this stamp put's out a new line of stamps at Christmas and have special discounts on specific sets and with each purchase they provide you with pictures of sample cards that have been made with them. The name is on the tip of my tongue... nope... it's gone. Hop on by Nancy's blog (Nancy's Creative Mess in my 'cool links') as she is really good at remembering names and I am certain she has posted the name of the company that made this stamp on her blog. I have a fellow at Church that wanted me to make a plain Christmas card with no sayings in it so not to offend anyone. I do not wish to offend anyone either. I like the simplicity of this card though I would love to put a 'Merry Christmas' or 'Christmas Blessings' on it of some sort.
Well, thanks again for stopping by.
Happy creating everyone!

Artsy-Bella


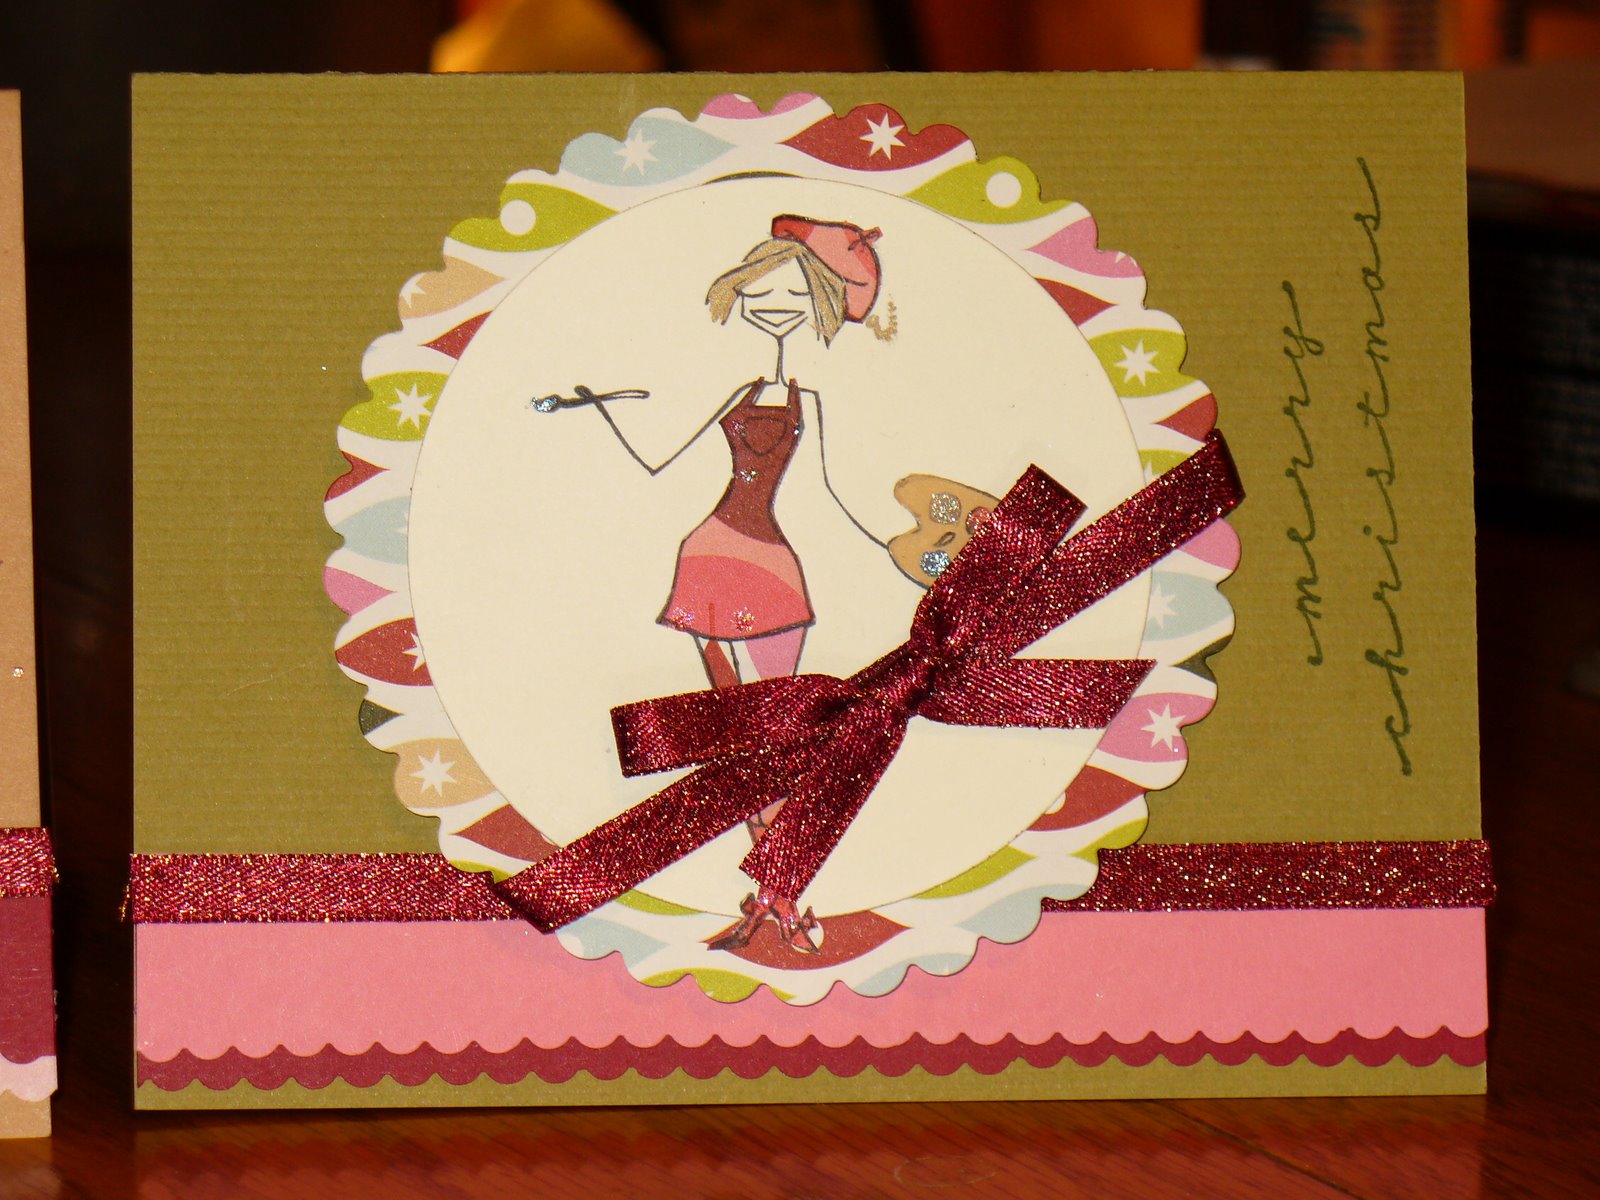
Wow - I can't believe it has been a whole week since I posted last. What have I been doing? Hmmm... let me see... Friday night was 'Movie Night' at our Church and we watched Ratatouiie, Saturday was... Randy painted at the Church and I spent the day with the boys just hanging out, we went to see the movie Enchanted which was awesome. Saturday night was Youth night. Sunday was Church, then Sunday School potluck, Monday - can't remember, Tuesday was lunch with some friends and shopping, then parent teacher interviews... Wednesday I spent all day with Randy as he had the day off... ah yes then the boys got out early on Thursday and they had no school today! Wow, a week really does fly by.
I managed to have some 'play' time today and decided I wanted to make some Christmas cards for my 'artsy' friends. What better time to use my Artsy-bella stamp from Stamping Bella than now. I enjoyed piecing a funky outfit together for these gals. It was a little tricky using this for a Christmas card because it isn't really intended for one, but the shimmering ribbon adds a 'Christmasy' feel, I think it does anyway. I couldn't give it to everyone on my list though I know exactly the friends that will appreciate this card.
Thanks for stopping by my blog. Please leave a comment so that I know who stopped by.
Happy Creating!

Friday, November 23, 2007

It's-a-bella Cute Baby Shower Cards


Teddy-a-bella is such a cute stamp! I created these two cards this afternoon while watching my movie "Material Girls" and half listening to my son's computer playing 'Myth Busters', something about hot chili sauce and milk, and scaring elephants with little white mice (boys are a strange creature aren't they????) Lol. I have four friends having babies within the next year so I figured some shower cards might come in handy. Since I am selling the cards this year at Church chances that someone is throwing a shower for one of them is highly plausable, I think they will sell quite nicely.
Bella stamps are awesome because I can be creative with the outfits the images are wearing - it's almost like dressing a paper doll! How fun is that??? That was exactly what I was doing while watching my movie this afternoon, stamping mini-images of a pregnant outfit and cutting and pasting them on the image. As I've mentioned before I would love to have all the Bella images, but I don't want to be greedy!
Well, happy creating everyone! Enjoy the rest of your weekend.

Thursday, November 22, 2007

Nestabilities and New Scrapbook Paper... Aaaahhh!


What can be better than watching an old musical and making cards in the afternoon?

While watching "Singing In The Rain" for the first time ever, I managed to make these three cards using my new scrapbook paper (from Costco) and nestabilities die cuts. I love the layering effect of the nestabilities as well as the colors of the paper.
I always enjoy adding bling to my cards, as "bling" is the new "thing" for cards and well everything it seems. I'll just stick to bling for my cards thank you very much! It's rather funny that I picked up some bling gems from Future shop - they are originally intended for your cell phone. LOL. What do you need bling on your cell phone for anyway???
These cards were relatively simple to make by just layering the different colors of paper and the diecut shapes. The bottom strip I rounded off one side with my corner punch and added a gemmed brad. Nice effect I think. I remember just a couple months ago I was using my fiskars circle cutter to make circles, now I just run through them with my nestabilities and cuddlebug and voila!!! Sooooooo cool!
I am having fun.
Well, happy creating everyone! Thanks for stopping by.

Happy Cards


I went to Costco yesterday with the 'love of my life' and I just happen to walk down the stationary aisle... have you been down the stationary aisle lately? To my wonderful surprise I discovered the most beautiful scrapbook paper all packaged nice and neat in a 12x12 "pink" or "blue" box. What is so wonderful about this paper, you might ask? For $19.99 you get over 300 sheets and the patterns are exquisite! The most beautiful designs and in multiple color schemes. They are not double sided or as thick as some scrapbook paper, but I don't mind that at all. I was in my glory, and mentioned this to my husband and boys many times yesterday! By the end of the night, before I even spoke a word they would all say in unison, "YES MOM, WE KNOW... YOU LOVE YOUR PAPER!" Lol. I guess I had a smile on my face the entire evening, and oh ya... did I mention "I love my scrapbook paper"?
These cards are made with three different sheets of that gorgeous paper. The flowers on this particular pattern just happen to match a flower punch I got last month (by Martha Stewart Designs) and so I was able to punch out a smaller flower for the larger flower image shown on the paper. It worked out rather nicely if I do say so myself. I used my cuttlebug to cut out the letters. I am really enjoying my new discoveries lately.
Well everyone, happy creating... thanks for stopping by.

Monday, November 19, 2007

Circle's, Circle's, Circle's... Cards


I am having fun with my Nestabilities now that I am feeling well enough to use them. I wanted to create a card that had lot's of circles in different layers and this is what came out of it. I had to make a template for the circles and this was not exactly an easy process in making them all line up accordingly... in fact it was pretty much darn near impossible for me which you can see on some of the circles.
I like cards with lot's of detail but not too difficult to do and cards that are different, not just the 4 1/4" x 5 1/2" size. (although I still like making the usual cards too)
I saw a card with a similar idea on Splitcoast Stampers, www.splitcoaststampers.com, in which there were little windows on the front, and then those windows were layered with more windows and in the background were little Christmas images. It was so cute I had to make something like that. As you can probably gather from my previous cards, I am a huge Nativity nut. Those are my favorite cards to make.
Well I hope you enjoy these cards.
Happy Creating!

Cool New Tatt's


My son Joshua came home from school with a tattoo on his arm (temporary of coarse), the artist in me sprung to the surface the second I saw it! I thought it was the coolest image and I wanted to do one right away. What it is, is this...
1. You draw your name in capital letters JOSHUA (eg)with all letters touching each other.
2. Next write the name again but going backwards from right to left over top of the front way.
3. Then you draw a line through the middle, and then an X through the entire image like you are crossing it out.
4. Now you go outline the outside of the image with a black marker (washable ofcoarse)and then outline the inside white marks to achieve the finished look.

Pretty cool huh? I loved them. I now have three; one I did of my name, one Josh did on my right arm that say's "Daddy's Girl" (?), and then Ben drew "I Love You" on my left arm. Basically my whole family is covered in tattoos! How fun is that? Give it a try, I'm sure you will have lot's of fun!
Happy creating!

Friday, November 16, 2007

Nestability and Cuddle Bug Fun


As noted from my previous entry, I received my "Nestability" order this week and was able to make a few cards, little goodies. I love Christmas Crafts and so I will usually make up some different things other than just cards, so... while staring at my new 'scalloped small circle' Nestabilities and my Cuddle-bug, I decided to make up a Christmas gift-tag package. I love the stamp set that I got called "Snowman Nativity" from TAC. I stamped only the faces of Mary and Jesus on the smallest scalloped circle (with white cardstock), then layered it with the one size up scalloped circle on my "Michael's" Christmas Slab paper. Placed both circles on red cardstock, cut a piece of another colored Christmas slab paper and voila - there became the basis for my tags.
For the package I used 6x6 refill of scrapbooking page protectors, cut off the strip with the holes for placing in your scrapbook, then taped it onto a piece of cardstock approximately two inches longer than the top of the refill sheet where I score a line in the cardstock. Once folded down I can now decorate to my hearts delight. I used One large scalloped circle die cut (on Michael's Christmas Slab scrap paper) and two small scalloped layers with the Mary and Jesus, placed on either side of the the large circle. I then used my "Cropodile" to punch two holes in which to run ribbon through and tie the package together so that it will not open until ready for use.

The next project I did was the blue snow flake with the "Stampin-Up "City of David" stamped image on the large scalloped circle. I cut the card down two inches from 5 1/2" length to make it only 3 1/2" length. Then I measured and placed the scalloped cirle to reach the 5 1/2" length to properly fit in an envelope. I did not have the right blue for this project as I used 'Brocade Blue' (SU) ink when I needed a more 'Baby Blue' color to match the background scrapbook paper. So I enhanced it by chalking around the City and Words on the card and this helped me to be more satisfied overall with the card instead of focusing on the fact that I had the wrong blue. I am learning to broaden my horizon's when it comes to being perfect! LOL
Well enjoy. Happy Creating!

Newest Bellas


I haven't been producing too many cards lately... however I managed to make a few Bella's this week. "Merry Bella", "Gift-a-bella", and "Sista-bellas". I can't get enough "Bella" stamps - they are unique and fun. I love that I can stamp the image on scrap paper and cut out an outfit for the ladies. My girlfriend Nancy dropped off my 'Nestabilities' order of die cuts, and I was able to use the scalloped small circle die cuts for two of the Bella cards. What a great technique this is. Before they came along all I had was boring circles, now I have scalloped edges. I wish I would have purchased more though! I have been viewing many different cards using all sorts of 'Nestability' shapes and wished that I had them too! You can't get them all though! I love Christmas! I just don't like being sick during this season as I can't make and create all the cards I have wanted to - being in bed kind of limits one's crafting abilities.
Hopefully I am on the right medicine (after going on 6 weeks of Chronic Bronchitus) and I will be able to dig right in where I left off before I got sick. I finally figured out how to use my Flovent Disc (it's not just an easy inhaler these days - LOL), so at least it should be getting into my lungs the way it is supposed to.
Well happy creating! Enjoy these Bella's as I enjoyed making them!

Sunday, November 11, 2007

More Cards - Merry Christmas


I made a number of different layouts with these cards. I don't normally use only a sentiment to grace the front of the card, however this seemed to work out nicely with the sentiment being so large. I am not too sure what I think of these cards yet, maybe they will grow on me. I find that they are possibly lacking something though I am not sure what it is. That's where your comments come in handy! Please leave me a comment and let me know what you think about these. Thanks so much!
Happy creating!

New Cards and Feeling Better!


I haven't posted in a bit because I have bronchitis, so now I am able to post a few cards that I was able to work on while my boys and husband were at Fall Retreat with our Church. I know I really should have been resting, but when I am faced with a hugely quiet house, I cannot just rest in bed! I must do something... so I crafted and watched "Gilmore Girls Season 6" that I rented from Blockbuster (Not all of it of coarse, just two discs worth)! As I was resting I was able to read a new magazine I bought (Holiday Cards, Paper crafts) and I fell in love with a card by Lisa Johnson (Manger Scene). I have wanted to try this card out for a long time (as I have been sick for over a month!).
So... here is my rendition of (Manger Scene). I used last year's leftover scrap paper for the background. The stamp I used was from TAC - The Angel Company. I stamped it three times - first on ivory paper, then on brown paper, then on yellow paper and cut and pasted as needed for the layers. This was not too hard to do for me as I did it while laying in bed (more like sitting up) and needed something to do with my hands anyway. I love little details and getting my hands right into the projects I am working on. For some, they might find this a tedious task. At the top I punched out a circle and stamped a star, using the edge of (more mustard stamp spot from Stampin up) I just put a light mustard edge to the circle and lines coming from the star. I layered this on top of a (more mustard) cardstock triangle - representing the light shining down on the baby Jesus. The rest was just layering and embellishing. I like the cards to which I added some provo craft flowers, however it was not feasible to add this to each card as I did not have enough flowers and they would have been too expensive.
Happy Creating Everyone!

Friday, November 2, 2007

Snowmen Nativity Cards


This stamp set is the cutest little nativity set I have seen. I received this set through my girlfriend Nancy as she ordered from a lady in the States. I am not sure if the catalogue will be available in Canada or not. You can view it at:
Mrs. Nancy Grant
The Angel Company, Team Leader
(907) 852-5616
My TAC Website: http://nancygrant.ismyangel.net
It is a beautiful catalogue.
I enjoyed making these ornament cards. They really work well with the longer cards. This is the first year I have tried making longer cards. I like them.
The set is less expensive than other sets because they are not full sets mounted on wood - they come only with the stamps unmounted. I use them with an acrylic block until my husband makes me some wooden pieces to mount them on permanently.
The red card is more of a small card that spreads out and can also be used as a display for a Christmas Nativity. I really like this one.
Happy Creating!

Sunday, October 28, 2007

My First 'Stamping Bella' Card


I was so excited to receive my first "Bella" stamps on Friday, however I was very saddened by the fact that I was too sick to use them. Although on Saturday I had already prearranged for a number of ladies and kids from my Church to come over and help make cards for this year's fundraiser... so I was able to play with one of my 'bella' stamps. I think this one is called "Merry Bella". It is so cute and feminine I can't help but love it! I cut out her dress, boots and hat from the same scrapbooking paper as in the background and glued it onto her. I then used 'Puffy' glue stuff and embossed it to make it look like 'Santa' boots and hat. Then I went to work on coloring the rest with gel metallic sparkly markers. The end result turned out great. The large snowflake added a cute little embellishment effect. I really like this card and look forward to making more "bella's".
Please send me copies of your "bella" cards - I would love to see them. You can post them in your comments for my post, or you can e-mail them to me at ksun_1999@yahoo.com . I look forward to seeing them.
Happy Creating!

Kid's Ministry Kids Help Make Cards


Yesterday was a busy house indeed... four kids from Kid's Ministry at the Garden (My Church) and two Sunday School teachers came over to help make Christmas cards for the fundraiser this year. I found it a time of growth and "letting-go" for me as I sat back and watched the kid's 'go-to-it' with all my stamps, papers and supplies. (As a stamper/cardmaker/scrapbooker/artist you may begin to know what I mean) At first it was difficult for me to breathe because I am a little bit (49% according to the below test) perfectionist - LOL! After awhile though it was an awesome experience seeing the creativity in the room blossom, the cheery faces singing with the Christmas carols playing in the background and everyone working together to pull this fundraiser off.
Little 7 year old Haleem made the middle card in this posting. If she can make something so beautifully creative at 7, imagine what she will create during the rest of her life.
10 year old Maikaila made the card on the top of this post. She is very creative as well and loves crafting with me. They all had a wonderful time... Anna, Anejka, Haleem, Maikaila, Nicole, Rachel and myself. I wasn't feeling too well during the proceedings so I actually got to sit back and enjoy the creativity flowing around me.
Well, I hope you enjoy seeing these lovely creations.
Happy Creating everyone!

Friday, October 26, 2007

Long Thin Cards For Christmas


My girlfriend Nancy from "Nancy's Creative Mess" made one of these long cards and I really liked it. You can see hers on one of her older posts just look at my Cool Links. So... I decided to try and make some of these myself and the above cards are what I turned up with. I really like the tree one. I had a strip leftover of the scrapbook paper and I didn't want to throw it out. If fit perfectly with this card. The snowflake on the Merry Christmas turned out perfect because I had some left over brads that I have rarely used and they worked great (I wouldn't have thought to use those colors for a snowflake but it makes it unique). I also got to use my "Stampin-up" "Shapes and Shadows" set that I haven't used in a long time for the tree. I like these cards but unfortunately you can only make one card instead of two out of 1 piece of cardstock! That is the only downside to these cards. They are rather beautiful though, and original I think.
Happy Creating Lovelies!

Once Again... Some More Christmas Cards


I have been working on some different ideas of Christmas Cards for the Kid's Ministry Fundraiser. Here are three more that I have made. Another slider card, and two different templates for cards. On the one with Love Hope and Peace I colored the edges of the scrapbooking paper with the same color of ink as the paper even though it didn't exactly match the paper used. The snowflakes were more red than burgandy, however the outcome did turn out nicely. This is one of my favorites. I think I will try to use this technique more often and make the scrap paper I use match by inking the border of it. That way I won't waste so much scrap paper.
The Thoughts of You card I made for a lady who wanted to give her daughter a card. I don't like it as much as I thought I did as I look at it on here... it looks like it is needing something. I think the blue circle behind is too plain or something. The "Thoughts of You" stamp was one from the $1.50 bin at Michael's - I love that bin and have found some really cute stamps from there. How can you say no to $1.50??? Well I guess you can if your cart is full of them! LOL.
Well happy creating!

Tuesday, October 16, 2007

Circle Overlap Christmas Card


Over the weekend I worked on this card and made a number of them. I really love the rich colors together. For the strip on the inside I used a piece from the Michael's Christmas Slab, as well as for the outer circle. The inner circle was stamped with one of the stamps from "Jesus is Born" set from Stampin-up. The ribbon I purchased at Michael's for 40%off (I love things on sale). The "Christmas Blessings" was from the same set, I punched it out with my slot punch from 'stampin-up.

Happy Creating!

Criss Cross Card


Karen, over at Karen's Kreations posted one of these Criss Cross cards that she had made while attending one of those Stampin-up days where they show you how to make the good stuff! I loved hers (which you can view by choosing her link at the bottom) and so I asked her to send me the template and she did! Yeehaw! I was so excited I went to work on mine late last night. (Crazy stampattic I am and all!) I used paper from the Michael's Christmas slab (glittered one), I cut out two ornaments from one of the pages to match the paper and add as embellishments to my card. It looks beautiful and the great thing about it is that it is relatively easy to make. You can get to the template by going to;

http://www.splitcoaststampers.com/resources/crisscrosscard.php

If you can't find it please let me know and I will try to get it to you. E-mail me at ksun_1999@yahoo.com

Happy Creating!

Sunday, October 14, 2007

Anniversary Bliss


We had the best Anniversary ever this past week. We celebrated 14 years of blissfully happy marriage (remembering only the good stuff of coarse!). My husband and I spent the day together walking around 'Kensington', a small part of town that houses coffee/tea, Art, Antique and knick-knack shops. Then we came home and rested the afternoon. For supper we were treated to a lovely dinner complete with waiter (our 10 year old son Ben) and Chef (our 12 year old son Josh) who proceeded to wait on us and give us a full out no-holds-bard 3 coarse romantic dinner. They both dressed up for the occassion in their best of their best clothing. We were so impressed we gave them each a $7 tip! They also clipped up a bunch of roses and spread them all over our bedroom (as to my urging) (teaching them to be gentlemen and all). We were extremely spoiled and are very blessed.
Well, once again, happy creating!

Friday, October 12, 2007

Cuddle Bugged


I purchased a new Cuddle Bug Embossing Folder "Circles" a few weeks back and it has sat in my desk unopened. Today I opened it! Yippee for me! My friend Nancy has this folder and I have seen it on other cards before but I hummed and hawed at getting it for a long time. Now that I have used it I am glad I bought it! All the embossed images from the "Cuddle Bug" (Provo Craft) add dimension to my cards though this is one of my favorites. Today I played with it in two ways... as a background and in a layered crop. I like both.
I started working one day per week so guess what???? I have a little bit of spending money! Woohoo! I went to Michael's and stocked up on some of my supplies because they were getting pretty low... well... okay... let's just say I needed a few supplies... and if some other things jumped into my basket well... I can't be held responsible for such things! LOL.
One of the items that I found was the lovely little pregnant lady as seen on three of the above cards. How much was this lady???? $1.50. YUP $1.50. I know what you're thinking... well that's great but what would you use a pregnant lady for??? Am I right? Well, the thought crossed my mind that I happen to know four ladies that are having babies this coming year and wouldn't it be nice to send them a note to let them know that I'm thinking about them??? For $1.50 I'm willing to pay to give them a little bit of a smile as they (suffer)... oops... did I say that??? I mean... as they enjoy their experience. Hee-hee. Plus... (my brain continued thinking) these ladies are all going to need showers right? What if I made their shower cards??? Now I'm really thinking, and 'YES' it hurts! So... the wheels are turning and I am all set up for the future of babies and for a small purchase of $1.50 at Michael's! It pays to think ahead!
The flowers you see on all the above cards were made with my new 'Flower Punch'. It is a Martha Stewart Design. I love the unique shape of this punch, all my other flower punches have curved ends... they feel monotonous to use... this one adds flair! I love it! It was only $16.99. Good price too!
I'm having fun!
Happy Creating!

Tuesday, October 9, 2007

Christmas Cards This Week


I received my newest Stampin-up set "Baby Jesus Is Born" last week and I was finally able to make a card with it. The set includes Mary/Joseph/Baby Jesus and two sheep, the sentiments "Christmas Blessings" and "Rejoicing with you in the Miracle of Christmas." I was looking for a set that was not too 'grown-up' because I am making cards for the Kid's Ministry at Church to sell as a fundraiser - this set is perfect for that purpose. I had some hempstring on my craft desk and it reminded me of hay so I put it in the back ground layer. I also added a star from another Stampin-up set (Peace and Love. The star was that little addition that brought the entire card together. I also used the star as an addition to the sentiments inside the card.

The Christmas Tree card was inspired from a visit to "Paper Pastimes" here in Calgary. They had a stamp that was a long skinny tree and they embellished it with markers making the dots on the tree and 'Stickles' for glitter. I layered the tree with two layers of paper and then two layers of double sided mounting tape to raise the surface. The pink toned paper in the background is from the Michael's Christmas Slab (The glittered one). The papers in this slab are so beautiful I don't want to use them but am glad when I do use them because it brings the projects I am making greater depth and beauty.

The "Oversized" Paper Clip (bought from Staples) I am making bookmarks with (also for the fundraiser for Kid's Ministry at my church. I cut two pieces of chipboard in 2x2" squares. Stamped my top layer with "All God's Children" Stampset from Stampin-up placing it on red cardstock. The crystals around the house and top layer are actually mini-micro beads, clear. I put a thin piece of double sided tape, then sprinkle the beads and let sit for 24 hours.

All these Christmas projects make me yearn for the Christmas season to begin - I love Christmas!
Well, Happy Creating Everyone!